Creating your own csv template file
Introduction
All fields included by PrestaShop for creating a product sheet are available in Store Commander's CSV import and export tools.
It can sometimes be difficult to know what information to add to your file when creating products, for example, so that you don't forget anything.
Thanks to Sc's CSV export, you can create a template file containing all the product fields that you can then import in just a few steps.
Of course, adapt the instructions below to your needs if necessary.
Step by step
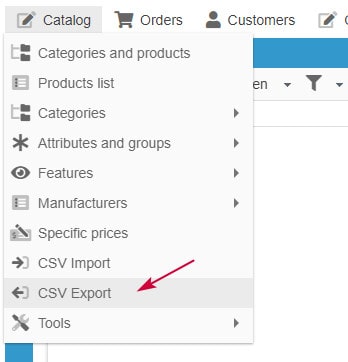
From Catalog > Export CSV
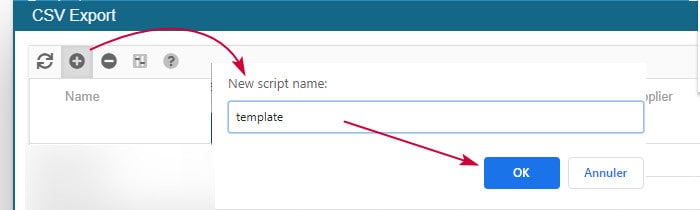
Create a script by clicking on the + icon, and give it a name
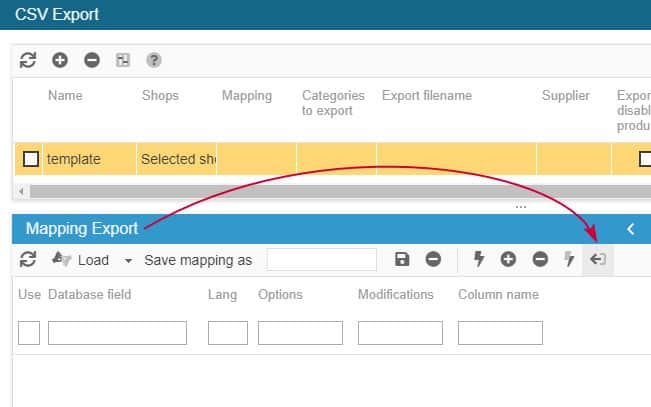
Select the line of your script (on a colored background)

Below, in the mapping panel, click on the list icon - open up the panel if necessary
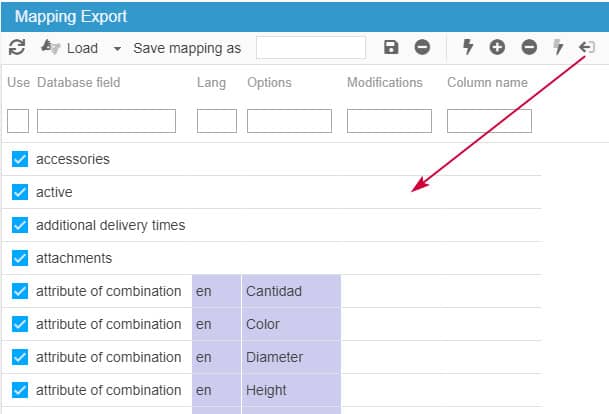
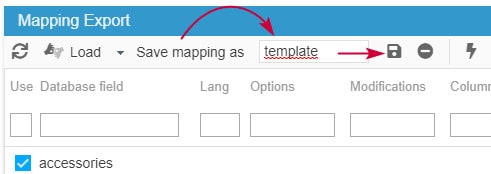
All PrestaShop fields are then loaded
Name and save this mapping
On the Categories panel, select just one category, with just a few products (no need to export all your products because we're just creating a template file)
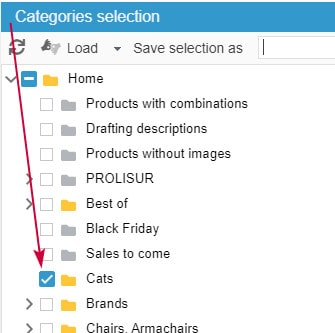
Name and save this category selection

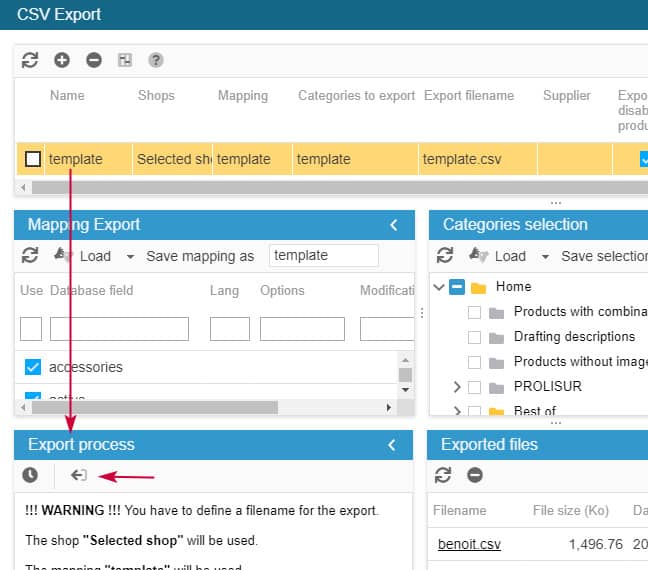
Go back to the line of your script and:
in the Mapping column: double click to choose the mapping name just created
in the Categories column, double click to choose the category selection name just created
in the 'Filename' column, double click to enter the name of the file to export, like template.csv - dont forget .csv
untick the option 'export by default category'
leave all other options as default
Start the export by clicking on the icon in the panel located at the bottom left
Once the export is finished, the download link is displayed: click to download/open your file
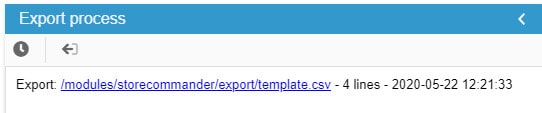
The file will also be present in the 'Exported files' panel on the right handside panel

That's it, you now have all PrestaShop fields in your file.
Of course, there will be probably be fields that you don't need, so feel free to remove them from the file to keep a csv template adapted to your needs.
Quick Checklist
Here is the ‘Checklist’ to run all your exports seamlessly.
Create your export script
Create your mapping & save it (compulsory)
Select your categories & save the selection (compulsory)
Select the saved mapping
Select the categories selection from the drop- down menus
Name your export file (remember to add the file extension)
Select the appropriate options
Run the export process
