Save time: import all your features in a few clicks
Associating features to my products
You can associate features to your products in bulk in a quick and simple manner using the CSV import tool.It is such a time saver when it comes to adding features to dozens or even hundreds of products!
Your CSV file will include a column per feature group, and feature values in the cell for each product.

The import mapping and configuration will be as follow (if using the product name as the identifier):
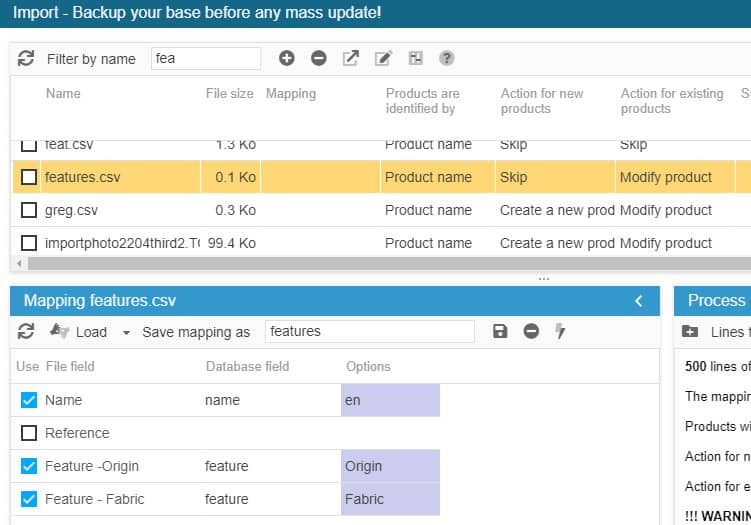
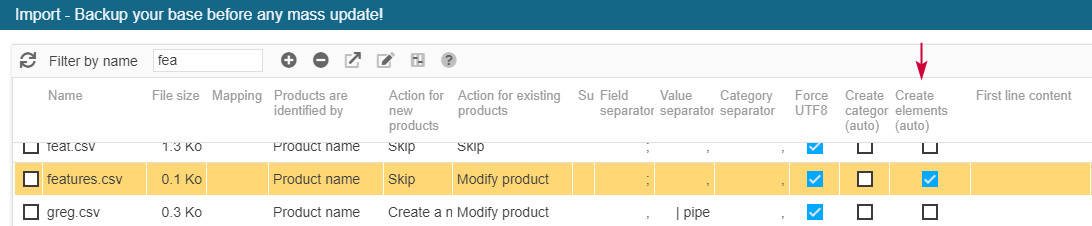
If new features values need to be created, don't forget to tick the corresponding option for the values to be created & associated during the import process:
Note that this is the example of an import using 'single' features. If you are using multiple features (native in PS 1.7), refer to the article below.
Associating multiple features to products via CSV import
Store Commander's Multiple Features add-on allows you to associate multiple features of the same group to multiple products within Store Commander's interface.
Multiple features can also be managed in bulk using Store Commander's CSV import tool.
Two database fields are added to the import tool when this add-on is installed:
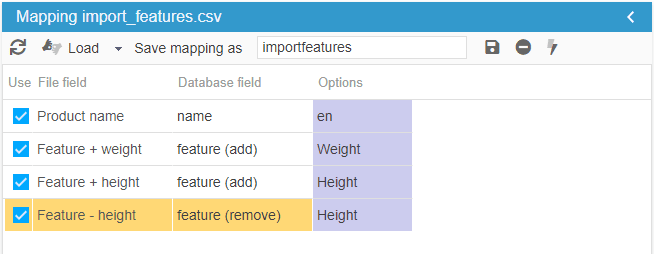
feature (add)
feature (remove)
These fields allow you to add (or remove) features to your products in bulk.
Your CSV file will use this format

Note that you can, as shown in this example, use multiple values to import your features, killing several birds with one stone :)
Your mapping will be:
Create new feature groups automatically
When importing features with Store Commander, new features values detected in the csv file wil automatically be created, thanks to the option 'Create elements (auto)'.

As soon as the import process starts, feature values present in the csv file will be checked. If they exists, they'll be used, if they don't exist, they'll be created automatically.
Please note that if the above option is not ticked and unknown values are detected, a message will be displayed for you to validate the creation before restarting your import.

It's also possible for new feature groups to be created during an import process, but this requires to have very specific column titles in your csv file beforehand.
The column title needs to be: feature NAMEOFTHENEWGROUP EN
Then, once the csv file is uploaded in the import window, in the Mapping panel, click straight away on the icon 'Load fields by name' on the toolbar.
This is when the feature fields will be automatically filled in with the name of the group in the Options column.
Using the 'Load fields by name' to automatically fill in the feature group name is what's going to create the new group. It's therefore necessary to respect the correct syntax in the column title if you want new feature groups to be created during the import process.


If the names of the new groups are not automatically completed in the Options colunm after clicking on the 'Load fields by name' icon, this means that the column titles of your files are not correct.
Replacing custom features with preset features
When products are using a mix of custom and preset features, it could lead to display issues on the front office if you're using a layer filtering tool. Because you could have the same custom feature multiple times.
We therefore advise to use only preset features: one value used on multiple products.
Fixing this means replacing all custom features with preset features.
And the most efficient and fast way of doing so, is to export the current features associated to products (custom and preset), and then import the file by using the feature preset fields in the import mapping.
It's rather simple because no modification is required once the file is exported, and no action is required on products either - the import process will do that for you.
Below are the instructions for you to follow.
Create an export script with a mapping including:
id_product + all features existing on your shop
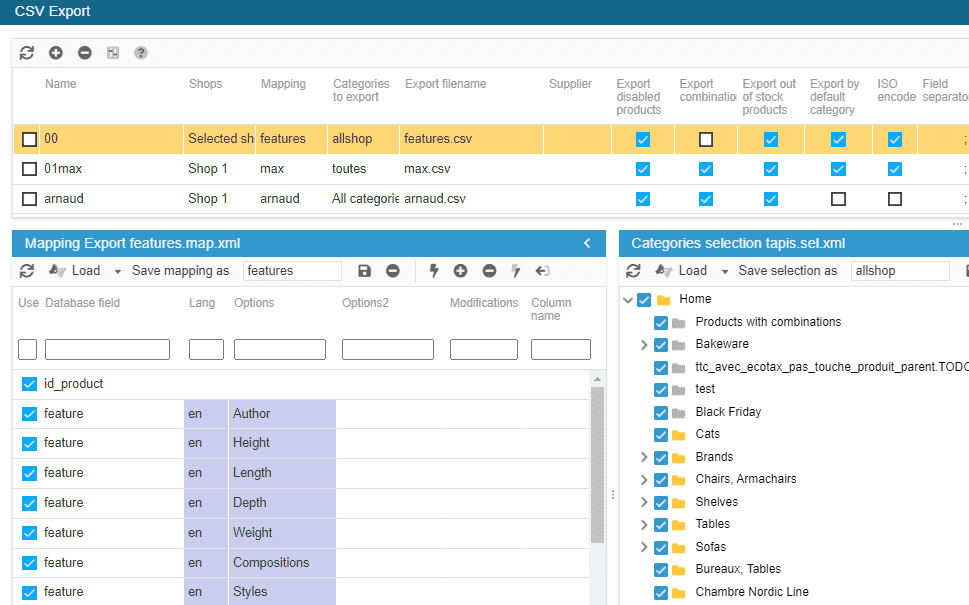
Note: if you are working on multistore mode, remember do add id_shop_list field
You'll then get a file with all your products and associated features (custom & preset).
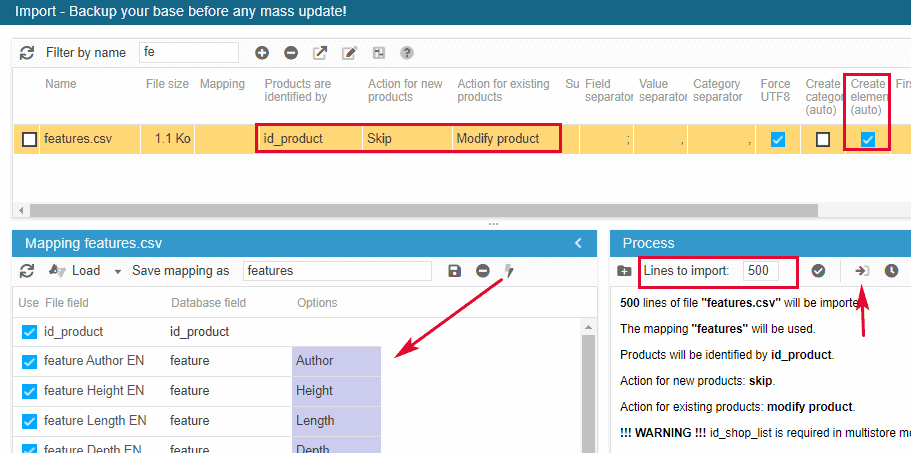
Once the file is exported, load it in Sc csv import tool.
To complete the mapping click the last icon on the mapping toolbar.
On the line of the import file (top panel), select id_product + skip + modify + tick the option ' Create elements (auto)' - this will create all custom features as preset features automatically.
Modify the number of lines if necessary.
Start importing.
All new preset features have been created and associated to the corresponding products, replacing the previous custom values.
Removing or replacing features
There is a procedure using the Store Commander import tool to replace existing features on products.
The action will first delete the existing features and then create new ones, all in the same import process.
You will need to use the ‘action: delete all product features’ available as an import mapping option.
Your file will contain the delete action in the very first column, followed by your product identifier (id, name, reference, etc.), and then the specific price fields containing the new values to be created.


The order of the columns is crucial. The deletion needs to occur before adding the new prices, therefore the column 'delete specific prices' has to be placed before the column containing the new specific prices values.